How to Use a Coffee Stencil
In the world of coffee, presentation matters just as much as flavor. Whether you're a seasoned barista or a home coffee enthusiast, adding a touch of artistry to your morning brew can elevate the entire experience. One simple yet effective way to do this is by using coffee stencils. These handy tools allow you to create beautiful designs atop your coffee foam, turning an ordinary cup into a work of art. In this guide, we'll explore everything you need to know about using coffee stencils to take your coffee game to the next level.
Step 1: Gather Your Materials Before you begin, make sure you have everything you need:
1. Coffee stencil(s) of your choice: These can be found in various designs, ranging from classic patterns like hearts and leaves to more intricate designs like animals or symbols. Find a great selection here on our site!
2. Espresso machine or a method to create frothy milk: You'll need a base of creamy foam to stencil your designs onto. This can be achieved using an espresso machine with a steam wand or a milk frother.
3. Freshly brewed coffee: Prepare your favorite coffee using your preferred brewing method. Whether it's espresso, French press, or pour-over, the choice is yours.
4. A steady hand and a sprinkle of creativity: While not exactly materials, a steady hand and a creative mindset are essential for mastering the art of coffee stenciling.
Step 2: Froth Your Milk If you're using an espresso machine, steam your milk until it reaches the desired consistency. For best results, aim for velvety microfoam with small bubbles. If you don't have an espresso machine, you can achieve similar results using a milk frother or by heating milk on the stove and frothing it with a whisk or handheld frother.
Step 3: Brew Your Coffee While your milk is frothing, prepare your coffee using your preferred method. Whether you prefer the boldness of espresso or the smoothness of a French press, ensure your coffee is hot and ready to go.
Step 4: Position Your Stencil Place your chosen coffee stencil over the top of your coffee cup. Make sure it sits securely and evenly to avoid any smudging or uneven designs.
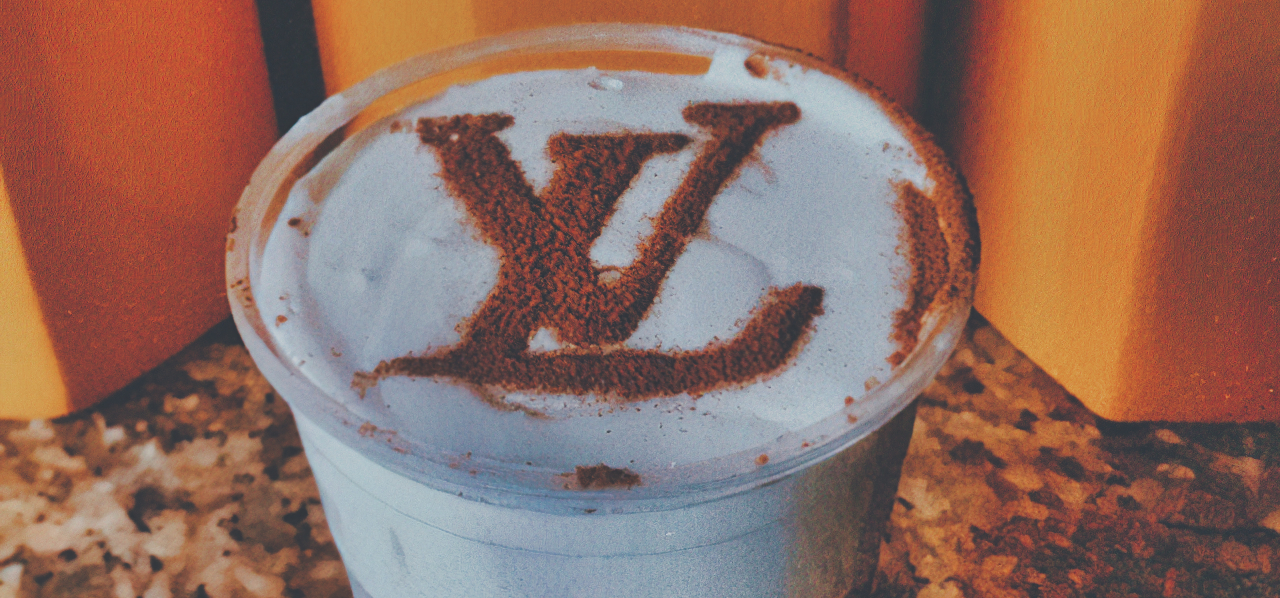
Step 5: Dust with Cocoa Powder (Optional) For an extra touch of flavor and visual appeal, you can dust your stencil with cocoa powder or powdered spices before removing it. This adds a hint of sweetness and enhances the contrast of your design against the foam.
Step 6: Stencil Your Design Once your stencil is in place, hold it steady with one hand while gently sprinkling cocoa powder or powdered spices over the stencil openings with the other. Use a fine mesh sieve or a shaker to achieve a smooth, even dusting. Be careful not to apply too much pressure, as this can cause the powder to clump or spill over the edges of the stencil.
Step 7: Lift and Admire Your Creation Carefully lift the stencil away from your coffee cup to reveal your masterpiece. Admire your handiwork and marvel at how a simple stencil can transform your morning brew into a work of art.
Step 8: Sip and Enjoy Now that your coffee is beautifully adorned with your custom design, it's time to sit back, relax, and savor every sip. Whether you're enjoying it alone or sharing it with friends, take pride in knowing that you've added a touch of artistry to your coffee routine.
Conclusion: Coffee stenciling is a fun and easy way to add flair to your daily caffeine fix. With just a few simple tools and a sprinkle of creativity, you can turn an ordinary cup of coffee into a visual masterpiece. So why not take your coffee game to the next level and give coffee stenciling a try? Who knows, you might just discover a newfound passion for the art of coffee.